HomeHardware
ByAnup Thapa

Gigabyte provides multiple Fan Control utilities from the BIOS-based Smart Fan 5 to programs that you can run from Windows like Gigabyte SIV and GCC.
If you want a quick and easy setup process, you can use the Automatic Fan Profiles in these utilities. These let you set the fans to different speed ranges at the click of a button. Or if you prefer customization over convenience, you can always use Manual mode to fine-tune the speeds.
I’ll cover the steps to use these different methods, and what you should and shouldn’t do during manual configuration in this article.
Note: This guide is for controlling the CPU and case fans. If you’re trying to control your GPU fan speed, you’ll want to use programs like MSI Afterburner instead.
Use Smart Fan 5 In BIOS
I strongly recommend the Smart Fan utility for controlling fan speeds. The Windows-based methods covered later are convenient, but they’re nowhere as stable/reliable.
Note: The latest Gigabyte boards support Smart Fan 6. But besides the UI change, it’s mostly similar to Smart Fan 5. So, you can use the same process and principles shown here to control the fan speed with Smart Fan 6 as well.
Open Smart Fan 5 Utility
Power on your PC and repeatedly press F2/Del to boot to the Gigabyte BIOS/UEFI interface.
- You can press F6 to quickly access the Smart Fan 5 utility here.
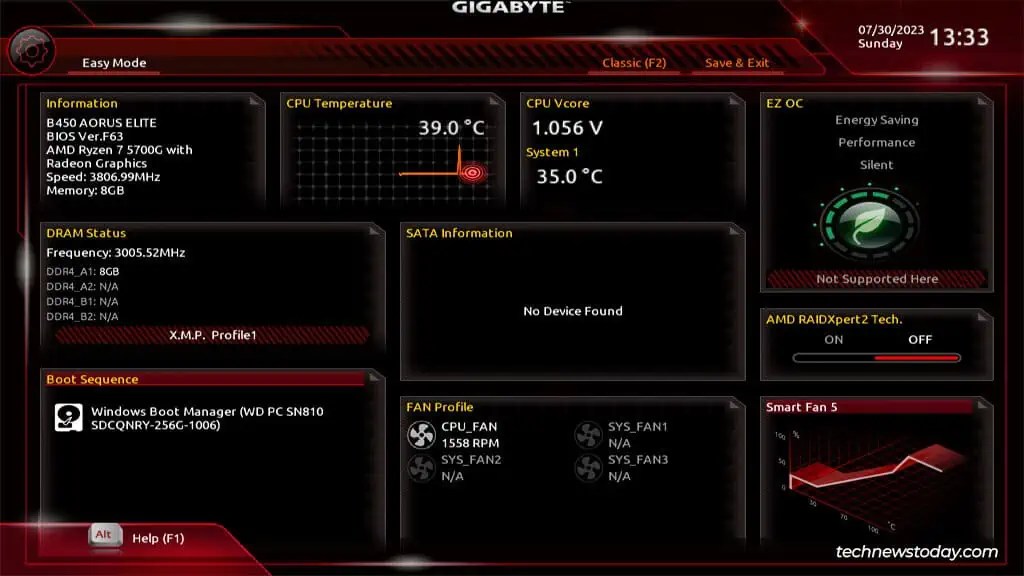
- If you’re in Easy Mode, you can click on the Smart Fan section.

- Alternatively, you also can switch to Advanced Mode with F2. Here, you can select Smart Fan 5 Settings from the M.I.T. tab.

Select Fan & Speed Control Mode
The first two settings you must configure are the Monitor Target and the Speed Control Mode.
The default target is the CPU fan (connected to the CPU_FAN header). But you can also monitor and configure case fans connected to the SYS_FAN headers.

As for the Fan Speed Control function, you have four options:
- Normal (Default): The fan operates at different speeds depending on the temperature.
- Silent: The fan runs at slow speeds.
- Full Speed: The fan runs at max speed regardless of the temperature.
- Manual: The fan runs according to the curve graph set by you.

The first 3 modes automatically set the fan RPM for you. As long as you pick the appropriate speed profile according to your usage intensity, these work pretty well.
But if you want to calibrate the fan speed to your exact needs, you can customize the fan curve in Manual mode.
Manually Setting the Fan Speed Curve
Note: If you selected one of the Automatic profiles instead of Manual, skip this section.
In Manual mode, the fan curve becomes unlocked for customization. The vertical axis represents the fan RPM (in %) while the horizontal axis represents the temperature.
Smart Fan 5 provides six curve nodes. You can adjust their position on the graph to create a curve that determines the fan speed according to the temperature.
For reference, here’s how I’ve configured it:

The first node sets a 0% duty cycle at 20°C. The second node sets a 30% duty cycle at 35°C, and so on. Finally, the sixth node sets a 100% duty cycle at 70°C.
Here are the main takeaways from this reference:
- At temps under 20°C, the fan runs at up to 30% of the max RPM. This is the default behavior. If the Fan Stop setting is enabled (covered later), the fan will not run while the temp is under 20°C.
- When the temp increases from 35°C to 45°C, the duty cycle also increases proportionately from 30% to 45%. You’ll notice the RPM change in real-time.
- As the temp increases, the fan RPM increases in the same pattern until it reaches the max speed at 70°C.
This was just a config that I use on one of our Gigabyte systems. If you want to find what works best for you, you’ll have to experiment. Just keep a couple of things in mind when creating your own fan curve:
- The nodes should always be set in ascending order. The opposite would mean that the fan RPM decreases as the temp increases, which is not what we want.
- Set the final node to 100% at 75°C or lower. Letting your system get to temps above 75°C is not good for your components in the long run. You also want to ensure the fan is running at max RPM after reaching the final temp threshold.
Configuring Additional Fan Settings
After selecting an automatic speed profile or manually setting the speed curve, you can check out a few more settings before finalizing your configuration.
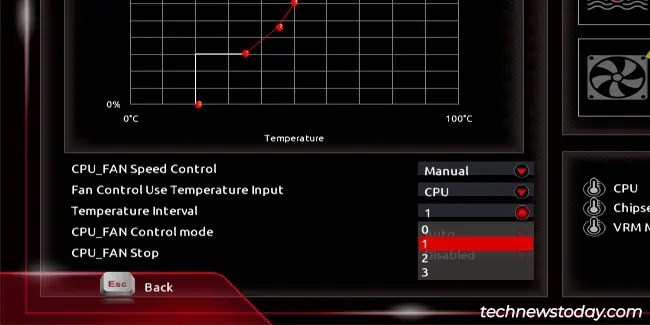
- Fan Control Use Temperature Input: Select the sensor to read the temperature from. This value is used for configuring the fan speed as done above.

- Temperature Interval: This is the time interval (in seconds) between two temperature readings.

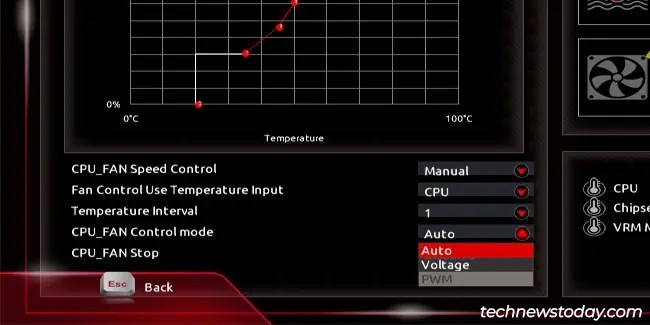
- Fan Control Mode: You can leave this to Auto. Or, you can manually select PWM (for 4-pin fans) or Voltage (for 3-pin fans). Selecting the incorrect mode will result in decreased fan performance.

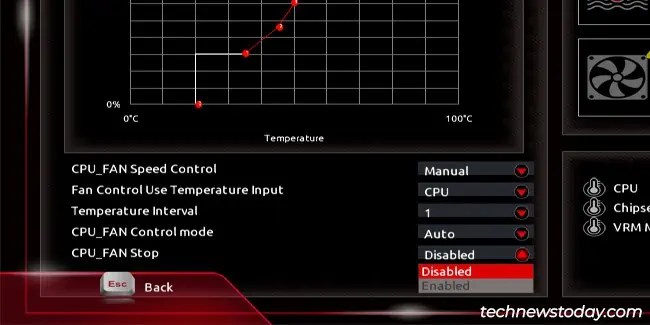
- Fan Stop: This is disabled by default. If enabled, the fan stops when the temperature is lower than the limit set using the curve.

You can also manage some optional settings like Temperature Warning or Fan Fail Warning from the right side.
When you’re satisfied with your configuration, press F10 to save the changes and exit the BIOS.
Gigabyte Fan Control with SIV
As I mentioned earlier, I’m not a fan of Windows-based utilities like Gigabyte System Information Viewer (SIV). They’re incompatible with many systems, and even when they do work, user reception has not been good due to frequent crashes.
So, I’d recommend you use Smart Fan 5 over this. But if convenience is a priority, here’s how you can use Gigabyte SIV to control the fan speed:
- Use the
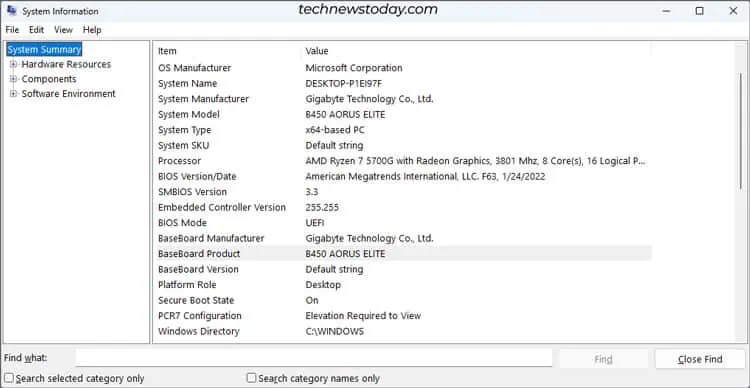
msinfo32run command to find your Gigabyte board model.
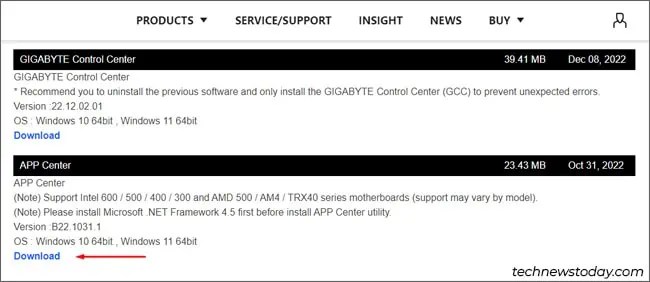
- Search for your motherboard model on Gigabyte’s site and click on Utility.

- Download, extract, and install the Gigabyte App Center.

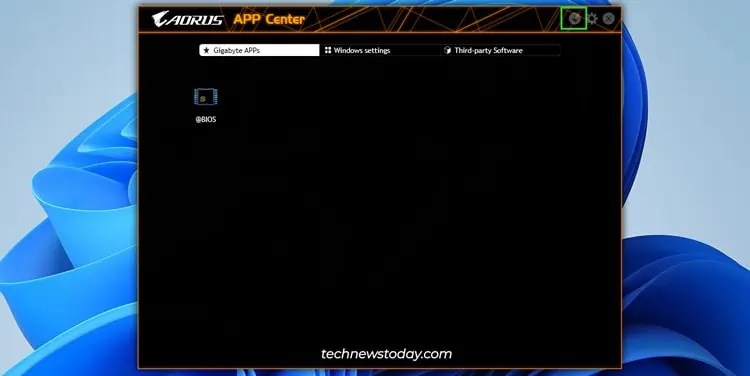
- Open the App Center and press the LiveUpdate button from the top-right.

- Select the SIV utility here. Uncheck any other packages that you don’t want, then press Install at the bottom.

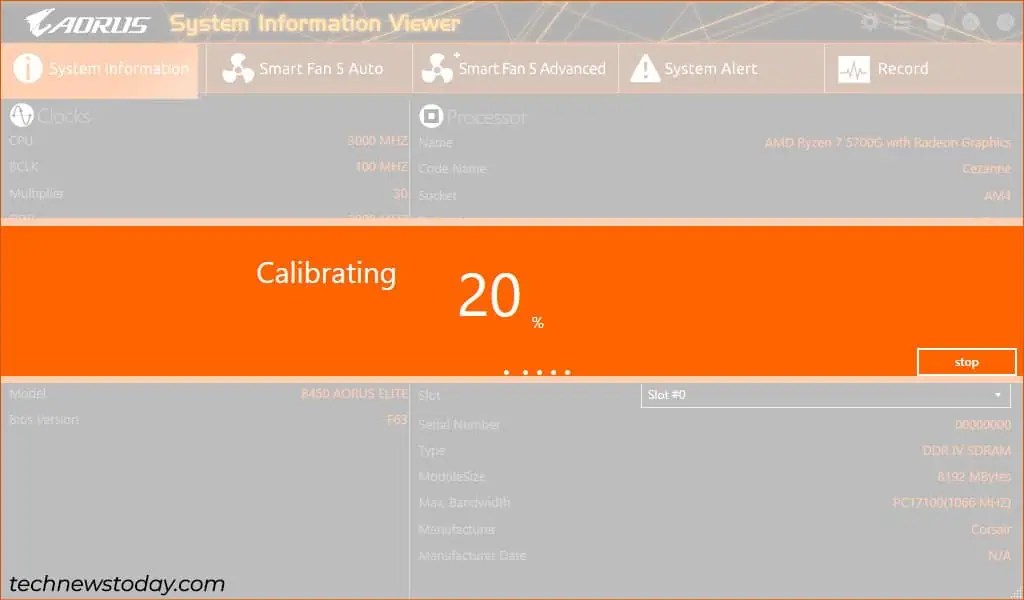
- After installing SIV, launch it from the home page.

- SIV will calibrate your system fans on the first launch.

- After calibrating, you can click to use Automatic profiles from the Smart Fan 5 Auto page.

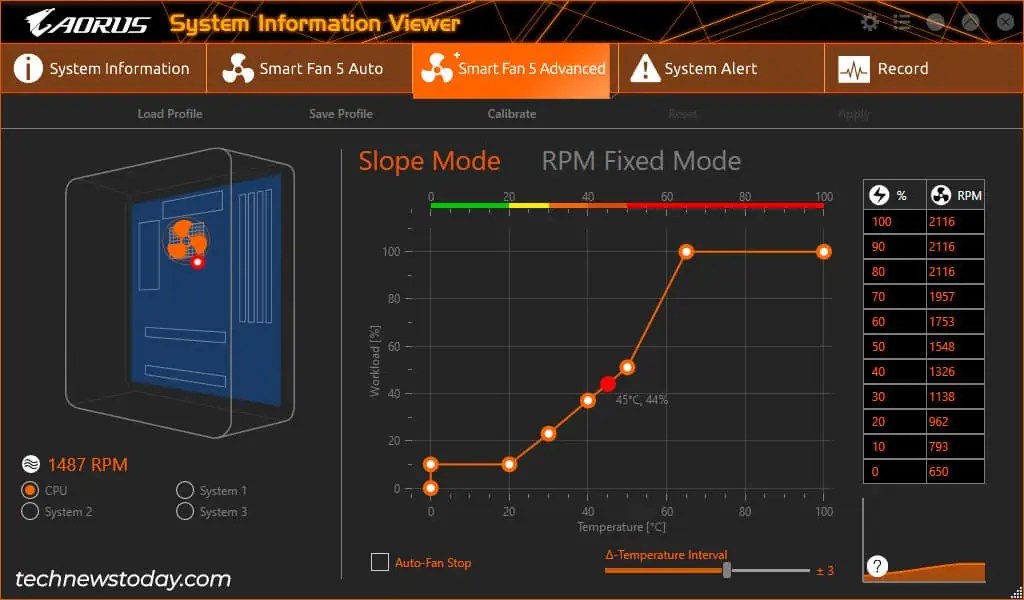
- The Smart Fan 5 Advanced page is similar to the Manual configuration covered earlier. You can select the fan to configure and set the fan curve, temperature interval, etc. from here. Don’t forget to press Apply after making the changes.

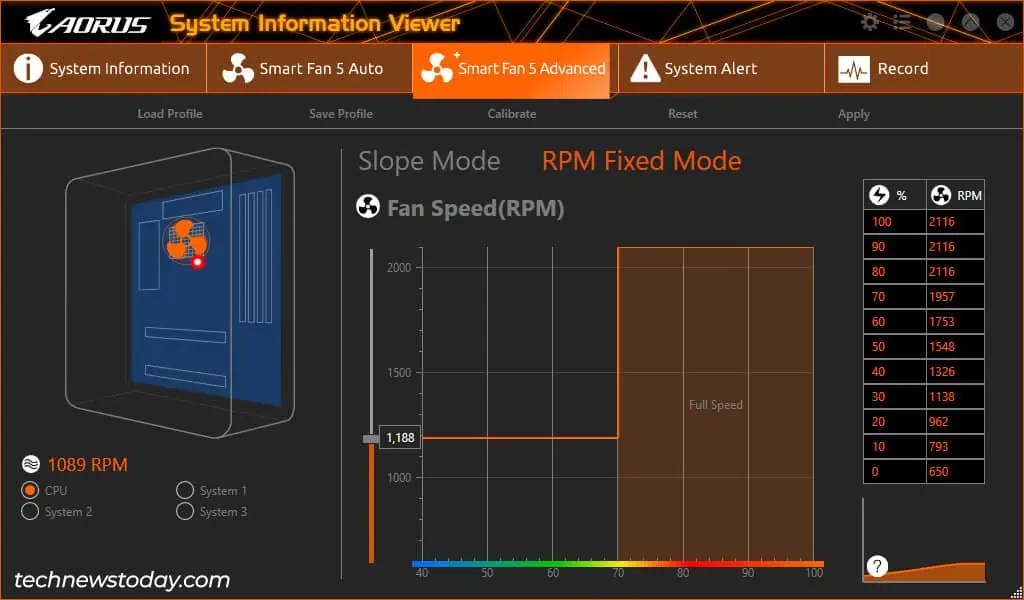
- You can also use some SIV-exclusive features here. These include auto-calibrating the fans, saving and loading config profiles, and resetting. You can even switch to RPM Fixed Mode (The fan runs at the set RPM until it reaches a temperature threshold like 70°C. After that, it runs at max speed).

Use Gigabyte Control Center (GCC)
GCC is a utility for monitoring and modifying hardware-related configurations. For fan tuning specifically, it’s slightly less customizable compared to the other two options. But if SIV isn’t compatible with your system and you want a Windows-based method, GCC can still get the job done.
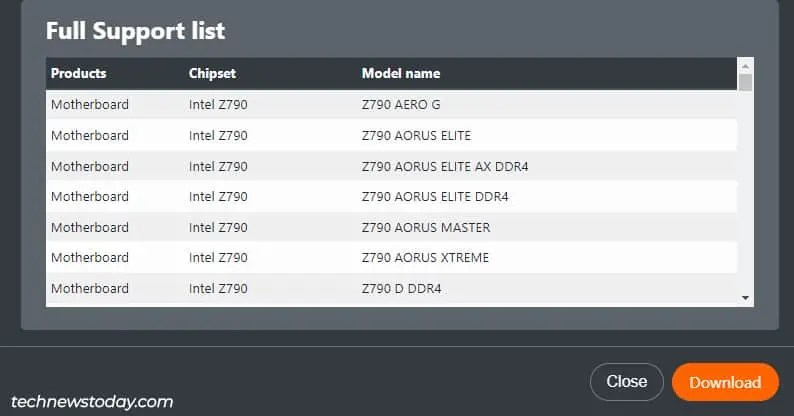
- Go to the Gigabyte Control Center page. If your board is supported, you can download and install it.

- Launch GCC and switch to the Fan Control tab.
- You can switch between the various Automatic Profiles here (Eco, Normal, Turbo, etc.).
- You can also set the fan curve yourself in Customize mode. Dynamic mode is for creating the sloped curve, while Fixed mode is for setting a fixed RPM.
Other Ways to Control Fan Speed
While these were Gigabyte-specific ways to control the fan speed, these aren’t your only options. You can also use OEM tools like AMD Software: Adrenalin Edition or third-party tools like FanControl to customize your fan configurations.
There are other niche methods too like hardware fan controllers that I won’t cover here. If you’re interested in any such methods, I recommend checking out our detailed guide on controlling fan speed on a PC.
